个人Hugo博客关于Even主题的一些使用改进
文章目录
记录下个人Hugo博客使用Even主题时的一些使用心得与个人改进。
GitHub Actions自动部署
参见利用GitHub Action实现Hugo博客在GitHub Pages自动部署。
改进Back to top
背景
原始的返回顶部按钮太小且背景提示色不明显,查看起来不直观。

修改代码
在assets/sass/_partial/_back-to-top.scss中修改如下配置
.back-to-top {
  display: none;
  transition-property: transform;
  transition-timing-function: ease-out;
  transition-duration: 0.3s;
  z-index: 10;
  background-color: $content-blockquote-backgroud;
  position: fixed;
  right: 10px;
  bottom: 10px;
  height: 30px;
  width: 50px;
  text-align: center;
  padding-top: 20px;
  border-radius: 20%;
  overflow: hidden;

  &:hover {
    transform: translateY(-5px);
  }

  .icon-up {
     vertical-align: top;
  }
}
运行效果
改进后的效果如下所示,不仅按钮变大,而且也能根据不同的主题颜色动态的进行改变。

其它
在assets/sass/_partial/_back-to-top.scss中有如下代码用于控制此按钮只有在非手机浏览器的环境下显示,此方式可用于其它需要在手机浏览器环境禁用的场景。
@include max-screen() {
  .back-to-top {
    display: none !important;
  }
}
区分Draft与非Draft
背景
-
有时候会遇到一些典型场景或者灵感突发,想把它们写入博客中,但由于时间限制一时半会又难以完成,可创建对应的
markdown文件,将draft设置为true,然后在正常打包时即可排除这些草稿文章,在本地编写时可用类似hugo server -w -D的指令来包含草稿文章。 -
当采用
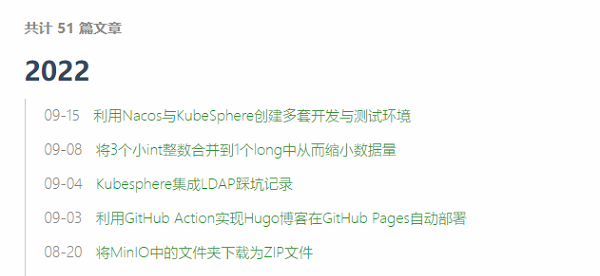
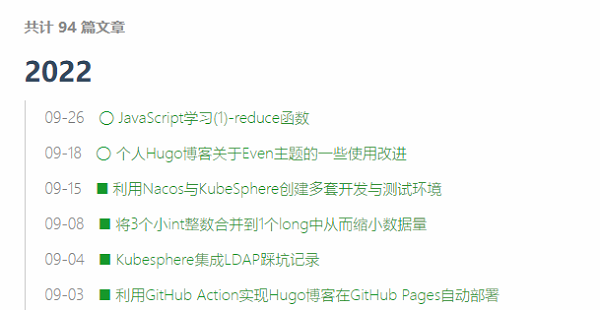
hugo server -w -D时在文章列表中不会显示是否为草稿文章,使用上有些不方便
修改代码
-
测试
assets/sass/_partial/_archive.scss添加如下代码.archive-post-status { color: $theme-color; } -
layouts/_default/section.html中添加如下代码<span class="archive-post-time"> {{ $element.Date.Format "01-02" }} </span> <!-- show draft status in none production environment --> {{- if not (in (slice (getenv "HUGO_ENV") hugo.Environment) "production") -}} <span class="archive-post-status"> {{ if .Draft }} ◯ {{ else }} ■ {{ end }} </span> {{ end }} <span class="archive-post-title"> <a href="{{ $element.RelPermalink }}" class="archive-post-link"> {{ .Title }} {{ .Title }} </a> </span> -
layouts/_default/taxonomy.html中添加如下代码<span class="archive-post-time"> {{ .Date.Format (.Site.Params.dateFormatToUse | default "2006-01-02") }} </span> <!-- show draft status in none production environment --> {{- if not (in (slice (getenv "HUGO_ENV") hugo.Environment) "production") -}} <span class="archive-post-status"> {{ if .Draft }} ◯ {{ else }} ■ {{ end }} </span> {{ end }} <span class="archive-post-title"> <a href="{{ .RelPermalink }}" class="archive-post-link"> {{ .Title }} {{ .Title }} </a> </span>
运行效果

部署时才添加访问统计
背景
在本地编写博客时,需要多次访问未完成的页面,此种页面没必要添加记录到网站访问次数统计中。
修改代码
在layouts/partials/scripts.html中修改如下,在最外层添加 if (in (slice (getenv "HUGO_ENV") hugo.Environment) "production")来判断环境
<!-- only work in production mode -->
{{- if (in (slice (getenv "HUGO_ENV") hugo.Environment) "production") -}}

	<!-- Analytics -->
	{{- if .Site.GoogleAnalytics -}}
	  {{ template "_internal/google_analytics_async.html" . }}
	{{- end -}}

	{{- with .Site.Params.baiduAnalytics -}}
	<script id="baidu_analytics">
	  var _hmt = _hmt || [];
	  (function() {
		if (window.location.hostname === 'localhost') return;
		var hm = document.createElement("script"); hm.async = true;
		hm.src = "https://hm.baidu.com/hm.js?{{.}}";
		var s = document.getElementsByTagName("script")[0];
		s.parentNode.insertBefore(hm, s);
	  })();
	</script>
	{{- end }}


	<!-- baidu push -->
	{{- if .Site.Params.baiduPush -}}
	<script id="baidu_push">
	  (function(){
		if (window.location.hostname === 'localhost') return;
		var bp = document.createElement('script'); bp.async = true;
		var curProtocol = window.location.protocol.split(':')[0];
		if (curProtocol === 'https') {
		  bp.src = 'https://zz.bdstatic.com/linksubmit/push.js';
		}
		else {
		  bp.src = 'http://push.zhanzhang.baidu.com/push.js';
		}
		var s = document.getElementsByTagName("script")[0];
		s.parentNode.insertBefore(bp, s);
	  })();
	</script>
	{{- end }}

{{- end -}}
使用方式
在项目部署时通过添加-e "production"来指定为生产环境,如hugo -b "https://lucumt.info/" -e "production"。
Fork me on Github
原始代码来源https://github.com/olOwOlo/hugo-theme-even/pull/4121,参考代码见如何在博客园添加 Fork me on GitHub 彩带效果
修改代码
-
config.toml中添加如下配置,若ithubForkURL值为空,则不显示Fork me on GitHub[params] githubForkURL = "" # Fork me on Github repository address # Fork me on Github仓库地址 -
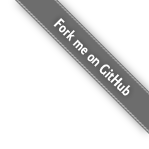
layouts/_default/baseof.html中添加如下代码{{ with .Site.Params.githubForkURL }} <!-- fork me on github ---> <!-- see https://github.blog/2008-12-19-github-ribbons/ --> <a href="{{ . }}" title="{{ . }}" target="_blank"> <img style="position: fixed; top: 0; right: 0; border: 0; z-index:9999;" src="/forkme_right_gray.png" alt="Fork me on GitHub"> </a> {{ end }} <!-- 在此代码块之前添加 --> <main id="main" class="main"> <div class="content-wrapper"> -
static目录下添加一个名为forkme_right_gray.png的图片,
运行效果
![]()
代码块可复制
原始代码来源https://github.com/olOwOlo/hugo-theme-even/pull/413
修改代码
-
config.toml中添加如下配置,用于控制是否开启代码复制功能[params] enableCopyCode = true -
assets/sass/_partial/_post/_code.scss添加如下代码.copy-code { position: absolute; right: 0; z-index: 2; font-size: .9em !important; padding: 0px 1.5rem !important; color: #b1b1b1; font-family: Arial; font-weight: bold; cursor: pointer; user-select: none; } -
在
layouts/partials/scripts.html底部添加如下代码<!-- copy to clipboard --> {{- if .Site.Params.enableCopyCode -}} <script> function createCopyButton(highlightDiv) { const div = document.createElement("div"); div.className = "copy-code"; div.innerText = "Copy"; div.addEventListener("click", () => copyCodeToClipboard(div, highlightDiv) ); addCopyButtonToDom(div, highlightDiv); } async function copyCodeToClipboard(button, highlightDiv) { const codeToCopy = highlightDiv.querySelector(":last-child > .chroma > code") .innerText; await navigator.clipboard.writeText(codeToCopy); button.blur(); button.innerText = "Copied!"; setTimeout(() => button.innerText = "Copy", 2000); } function addCopyButtonToDom(button, highlightDiv) { highlightDiv.insertBefore(button, highlightDiv.firstChild); const wrapper = document.createElement("div"); wrapper.className = "highlight-wrapper"; highlightDiv.parentNode.insertBefore(wrapper, highlightDiv); wrapper.appendChild(highlightDiv); } var isMobile = /iPhone|iPad|iPod|Android/i.test(navigator.userAgent); if(!isMobile){ document.querySelectorAll(".highlight").forEach((highlightDiv) => createCopyButton(highlightDiv)); } </script> {{ end }}
运行效果
在非手机浏览器中当开启enableCopyCode开关后,在代码左侧会出现如下效果2

添加搜索功能
修改代码
此部分的代码主要参考给hugo添加搜索功能基于fuse实现的,由于基于此博文实现的搜索效果展示比较简陋,故个人做了如下改进:
-
在
layouts/_default/search.html下添加了,用于将搜索结果用博客默认的风格包装起来{{ define "main" }} … {{ end }} -
在
layouts/_default/baseof.html实现前述步骤中相关的定义{{ block "main" . }} <main id="main" class="main"> <div class="content-wrapper"> <div id="content" class="content"> {{ block "content" . }}{{ end }} </div> {{ partial "comments.html" . }} </div> </main> {{ end }} -
在
assets/sass/_base.scss添加下述样式,用于分隔显示不同的检索结果#search-results-info { display: none; } .search_list { border-top: $post-border; }
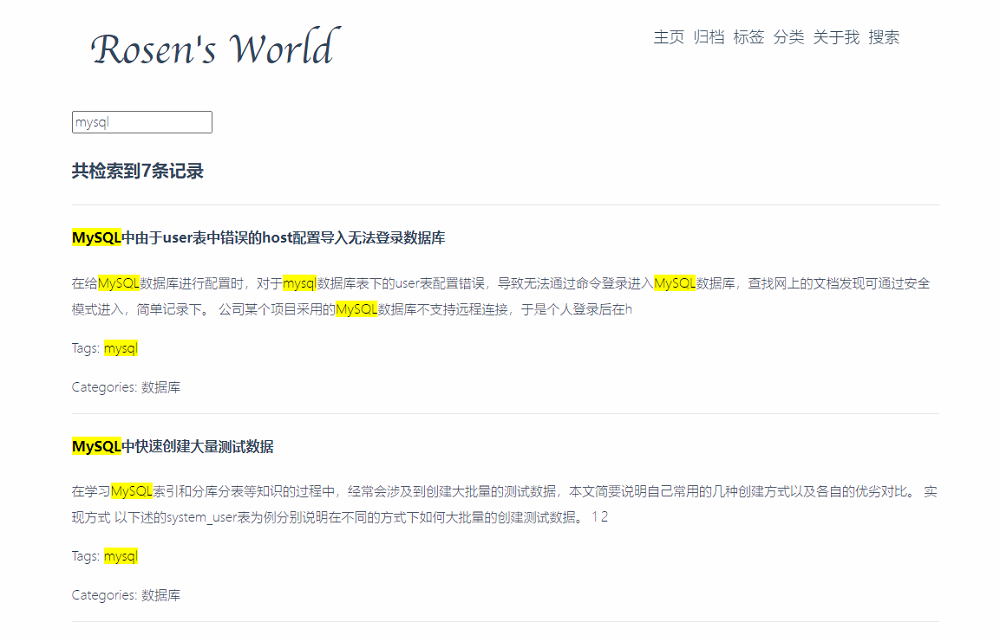
运行效果3
-
默认的搜索界面

-
输入关键字后,有显示结果的界面


