Foxglove自定义插件开发说明
文章目录
基于create-foxglove-extension一文简要说明自己如何基于RTSP协议给Foxglove开发一款插件并应用于实际项目的流程。
相关源码参见rtsp-player-extension。
问题背景
Foxglove官方虽然支持十几种类型的数据播放格式,但却没有对视频流播放的支持(截至到本文写作时)1,而自动驾驶等相关的汽车研发领域对于视频文件的播放却是一个刚需,且通常需要播放多路视频。
由于Foxglove官方支持图片、压缩图片、压缩帧这几种格式的播放,故一开始自己想的是将视频按照特定的频率抽取成多帧图片,在UI端按照时间顺序连续播放形成类似动画的效果,以间接实现视频播放的目的。
在个人实际项目中,视频的来源是RTSP,故而最初的处理逻辑如下,需要自己实现的核心逻辑为将视频流抽帧为图片
相关的代码如下,采用了基于Bytedeco提供的类库以FFmpeg的形式对视频进行处理。
|
|
上述代码的逻辑虽然不复杂,但在实际使用时却发现播放效果很不流畅,详细定位后发现下述代码耗时较多
|
|
表面上看60ms-70ms耗时不算很多,但若加上后续的格式转化、数据发送、数据播放等阶段,单帧图片在整合流程中的耗时就比较多了,导致实际播放时会有肉眼可见的明显卡顿。
上述代码耗时的原因是由于涉及到IO操作,一开始自己想寻找更高效的替代实现,Google好久之后没有找到更合适的方案,为了满足实际使用需求,此问题又不得不解决。
看来只能另想它法了。
由于RTSP视频流可以在浏览器中直接播放,若仿照下图省略掉抽帧、转换、发送等流程,在Foxglove中通过浏览器直接播放,岂不会节省很多时间?
由于Foxglove中尚没有类似的面板可直接使用,若要实现类似功能,只能自己开发相关插件,在此之前还需进行可行性验证。
初步验证
由于Foxglove的播放工作主要是UI端实现的,首先需要验证能否在HTML页面中直接播放RTSP视频流。
-
为了模拟
RTSP视频流,首先需确保安装有ffmpeg和mediamtx环境,首先在命令行中启动mediamtx,其输出界面类似如下
-
在命令行中执行类似如下指令
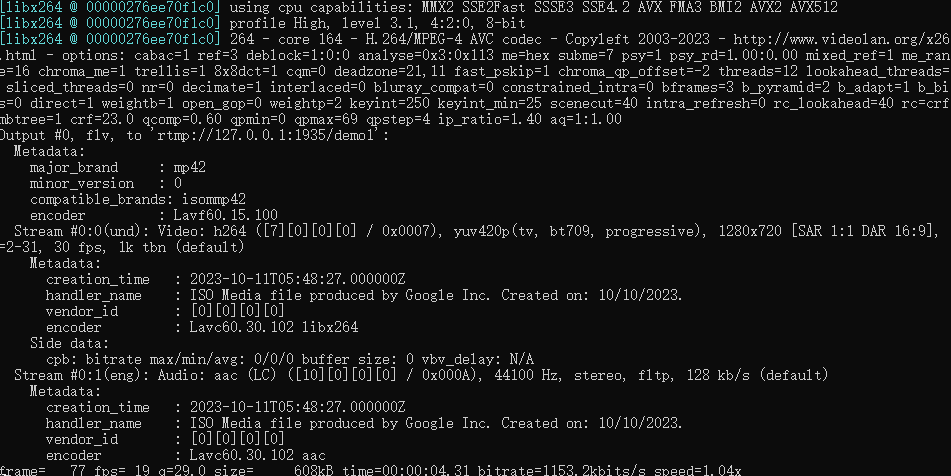
1ffmpeg -re -i E:\foxglove\usa_drive_2.mp4 -vcodec libx264 -acodec aac -f flv rtmp://127.0.0.1:1935/demo1若输出结果类似如下,则表示
RTSP视频流环境搭建成功
-
此时在浏览器中输入
http://127.0.0.1:8888/demo1即可正常播放该RTSP视频流 -
创建一个
HTML文件,在其中加入如下内容2,之后用浏览器打开该文件,发现视频内容也能正常播放1<iframe src="http://127.0.0.1:8888/demo1" scrolling="no"></iframe> -
至此可行性验证完毕,实际开发插件时只需要模仿步骤4即可。
插件开发
Foxglove中开发插件的教程请参见create-foxglove-extension,本章节以RTSP播放为例简要展示开发步骤:
-
首先确保自己本地安装了
nodejs3和npm环境,之后执行类似下述指令,来初始化工程1 2 3npm init foxglove-extension@latest rtsp-player-extension cd rtsp-player-extension npm install -
若上述指令执行正常,查看其源码结构类似如下,在开发插件时,只需要修改
src目录下的源码,其它的基本上不用改动
-
进一步的查看
src目录,发现其下只有两个文件:index.ts和ExamplePanel.tsx,各自内容如下index.ts内容如下:1 2 3 4 5 6import { ExtensionContext } from "@foxglove/studio"; import { initExamplePanel } from "./ExamplePanel"; export function activate(extensionContext: ExtensionContext): void { extensionContext.registerPanel({ name: "example-panel", initPanel: initExamplePanel }); }ExamplePanel.tsx内容如下:1 2 3 4 5 6 7 8 9 10 11 12 13 14 15 16 17 18 19 20 21 22 23 24 25 26 27 28 29 30 31 32 33 34 35 36 37 38 39 40 41 42 43 44 45 46 47 48 49 50 51 52 53 54 55 56 57 58 59 60 61 62 63 64 65 66 67 68 69 70 71 72 73 74 75 76 77 78 79 80 81 82 83 84 85 86import { Immutable, MessageEvent, PanelExtensionContext, Topic } from "@foxglove/studio"; import { useEffect, useLayoutEffect, useState } from "react"; import ReactDOM from "react-dom"; function ExamplePanel({ context }: { context: PanelExtensionContext }): JSX.Element { const [topics, setTopics] = useState<undefined | Immutable<Topic[]>>(); const [messages, setMessages] = useState<undefined | Immutable<MessageEvent[]>>(); const [renderDone, setRenderDone] = useState<(() => void) | undefined>(); // We use a layout effect to setup render handling for our panel. We also setup some topic subscriptions. useLayoutEffect(() => { // The render handler is run by the broader studio system during playback when your panel // needs to render because the fields it is watching have changed. How you handle rendering depends on your framework. // You can only setup one render handler - usually early on in setting up your panel. // // Without a render handler your panel will never receive updates. // // The render handler could be invoked as often as 60hz during playback if fields are changing often. context.onRender = (renderState, done) => { // render functions receive a _done_ callback. You MUST call this callback to indicate your panel has finished rendering. // Your panel will not receive another render callback until _done_ is called from a prior render. If your panel is not done // rendering before the next render call, studio shows a notification to the user that your panel is delayed. // // Set the done callback into a state variable to trigger a re-render. setRenderDone(() => done); // We may have new topics - since we are also watching for messages in the current frame, topics may not have changed // It is up to you to determine the correct action when state has not changed. setTopics(renderState.topics); // currentFrame has messages on subscribed topics since the last render call setMessages(renderState.currentFrame); }; // After adding a render handler, you must indicate which fields from RenderState will trigger updates. // If you do not watch any fields then your panel will never render since the panel context will assume you do not want any updates. // tell the panel context that we care about any update to the _topic_ field of RenderState context.watch("topics"); // tell the panel context we want messages for the current frame for topics we've subscribed to // This corresponds to the _currentFrame_ field of render state. context.watch("currentFrame"); // subscribe to some topics, you could do this within other effects, based on input fields, etc // Once you subscribe to topics, currentFrame will contain message events from those topics (assuming there are messages). context.subscribe([{ topic: "/some/topic" }]); }, [context]); // invoke the done callback once the render is complete useEffect(() => { renderDone?.(); }, [renderDone]); return ( <div style={{ padding: "1rem" }}> <h2>Welcome to your new extension panel!</h2> <p> Check the{" "} <a href="https://foxglove.dev/docs/studio/extensions/getting-started">documentation</a> for more details on building extension panels for Foxglove Studio. </p> <div style={{ display: "grid", gridTemplateColumns: "1fr 1fr", rowGap: "0.2rem" }}> <b style={{ borderBottom: "1px solid" }}>Topic</b> <b style={{ borderBottom: "1px solid" }}>Datatype</b> {(topics ?? []).map((topic) => ( <> <div key={topic.name}>{topic.name}</div> <div key={topic.datatype}>{topic.datatype}</div> </> ))} </div> <div>{messages?.length}</div> </div> ); } export function initExamplePanel(context: PanelExtensionContext): () => void { ReactDOM.render(<ExamplePanel context={context} />, context.panelElement); // Return a function to run when the panel is removed return () => { ReactDOM.unmountComponentAtNode(context.panelElement); }; }可以看出
index.ts的作用为注册要开发的面板,而ExamplePanel.tsx则是具体业务逻辑实现,同时该文件中有详细的注释辅助我们理解。同时通过
ExamplePanel.tsx也可发现Foxglove中的插件开发本质上是开发新的面板。 -
将
ExamplePanel.tsx修改为RTSPPanel.tsx,并将其内容修改如下:1 2 3 4 5 6 7 8 9 10 11 12 13 14 15 16 17 18 19 20 21 22 23 24 25 26 27 28 29 30 31 32 33 34 35 36 37 38 39 40 41 42 43 44 45 46 47 48 49 50 51 52 53 54 55 56 57 58 59 60 61 62 63 64 65 66 67 68 69 70 71 72import { Immutable, MessageEvent, PanelExtensionContext} from "@foxglove/studio"; import { useEffect, useLayoutEffect, useState } from "react"; import ReactDOM from "react-dom"; interface Timestap{ sec:number; nsec:number; } interface RtspInfo { rtsp_url: string; chassis_code: string; timestamp: Timestap; } const frameStyle = { overflow:'hidden', height:'100%', width:'100%', }; function RTSPPanel({ context }: { context: PanelExtensionContext }): JSX.Element { const [messages, setMessages] = useState<undefined | Immutable<MessageEvent[]>>(); const [rtspUrl, setRtspUrl] = useState<string>(); const [renderDone, setRenderDone] = useState<(() => void) | undefined>(); useLayoutEffect(() => { context.onRender = (renderState, done) => { setRenderDone(() => done); setMessages(renderState.currentFrame); }; context.watch("currentFrame"); context.subscribe([{ topic: "/drive/chassis_code" }]); }, [context]); let rtsp_url:string = 'http://127.0.0.1:8888/demo1'; useEffect(() => { if (messages) { messages.forEach(m => { let info = m.message as RtspInfo; rtsp_url = info.rtsp_url; setRtspUrl(rtsp_url) }) } }, [messages]); // invoke the done callback once the render is complete useEffect(() => { renderDone?.(); }, [renderDone]); return ( <iframe style={ frameStyle } src = { rtspUrl as string } allow="autoplay"> </iframe> ); } export function initRTSPPanel(context: PanelExtensionContext): () => void { ReactDOM.render(<RTSPPanel context={context} />, context.panelElement); // Return a function to run when the panel is removed return () => { ReactDOM.unmountComponentAtNode(context.panelElement); }; } -
将
index.ts修改如下,至此源码修改完成1 2 3 4 5 6import { ExtensionContext } from "@foxglove/studio"; import { initRTSPPanel } from "./RTSPPanel"; export function activate(extensionContext: ExtensionContext): void { extensionContext.registerPanel({ name: "RTSP流媒体播放", initPanel: initRTSPPanel }); } -
在项目根目录下打开命令行,执行下述指令,即可生成一个扩展名为
foxe的插件1npm run package -
默认情况下生成的插件名类似
unknown.rtsp-player-extension-0.0.0.foxe,里面的unknown和0.0.0看着很刺眼,可将package.json中的publisher和version修改为类似如下1 2 3 4 5 6 7 8 9 10 11 12 13 14 15 16 17 18 19 20 21 22 23{ "name": "rtsp-player-extension", "displayName": "rtsp-player-extension", "description": "", "publisher": "lucumt", "homepage": "", "version": "0.0.1", "license": "UNLICENSED", "main": "./dist/extension.js", "keywords": [], "scripts": { "build": "foxglove-extension build", "foxglove:prepublish": "foxglove-extension build --mode production", "lint:ci": "eslint --report-unused-disable-directives .", "lint": "eslint --report-unused-disable-directives --fix .", "local-install": "foxglove-extension install", "package": "foxglove-extension package", "pretest": "foxglove-extension pretest" }, "devDependencies": { // xxx } }之后重新执行
npm run package即可生成一个名为lucumt.rtsp-player-extension-0.0.1.foxe的插件产物,至此整个插件开发与构建流程结束,接下来的就是安装与使用。
安装&使用
-
在浏览器打开
Foxglove播放界面,之后打开前述步骤中生成的插件,将其拖动到浏览器窗口中,类似下图所示
-
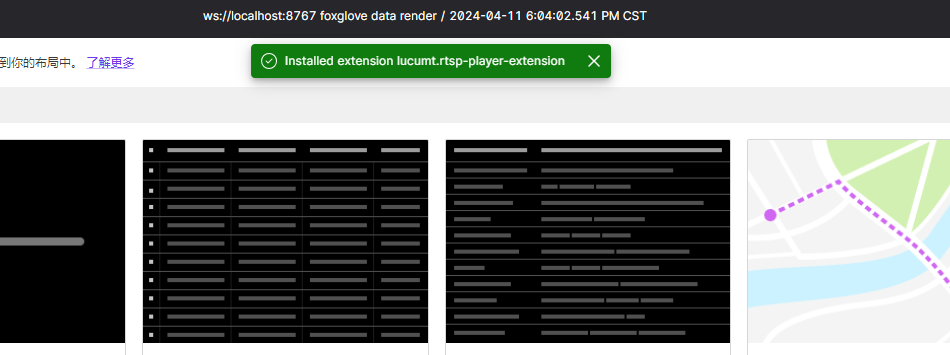
若安装成功,会在浏览器顶部出现相关提示

-
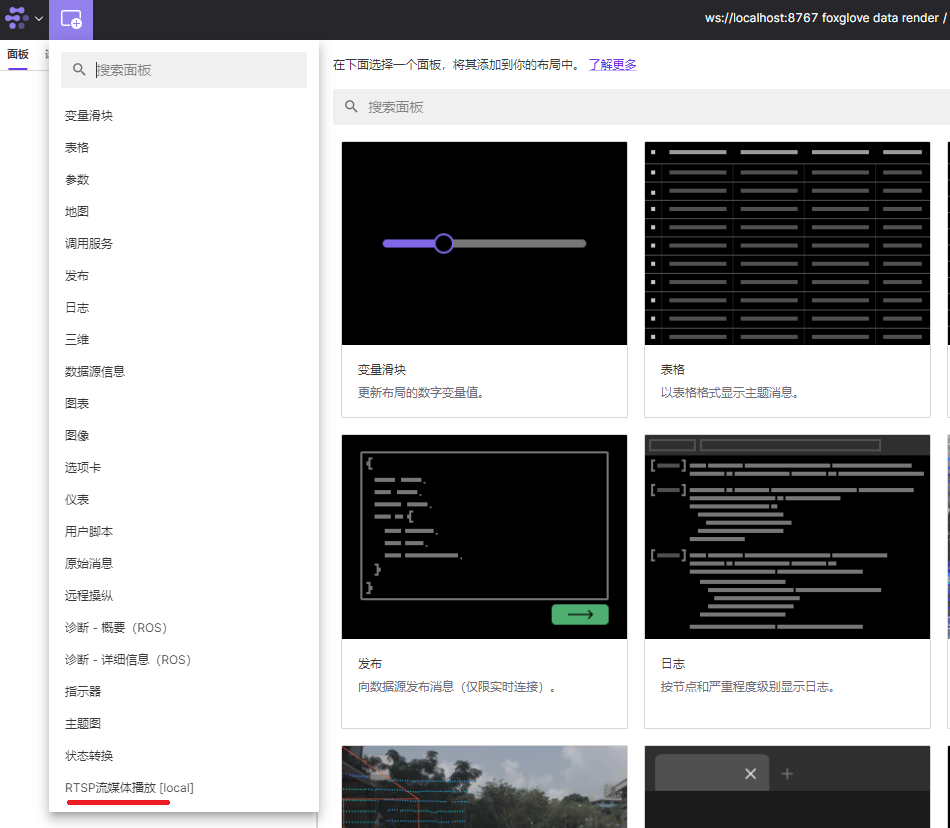
在新建面板时,可发现安装的插件位于列表底部,同时其名称中包含 [local] 后缀,可仿照正常面板的使用流程来使用该面板,使用效果参见RTSP视频播放,至此,
Foxglove自定义插件开发与使用的全部流程操作完毕!
-
GitHub上有人讨论此问题AVC / H.264 video support #88,但截止到目前依旧没有整合进去 ↩︎ -
有关
RTSP与HTML、JavaScript整合的说明可参考https://www.cnblogs.com/badaoliumangqizhi/p/17211019.html ↩︎ -
nodejs的版本推荐为16.xx.xx,个人实际测试发现用12.xx.xx版本时会导致初始化过程出错 ↩︎

